The holiday season is upon us, and what better way to welcome guests into your home than with a beautifully crafted DIY wreath? Creating your own wreath not only adds a personal touch to your holiday decor but also allows you to unleash your creativity. In this step-by-step guide, we’ll explore the materials and techniques needed to make a stunning wreath that will be the envy of all your neighbors.
**All links below are paid Amazon links**
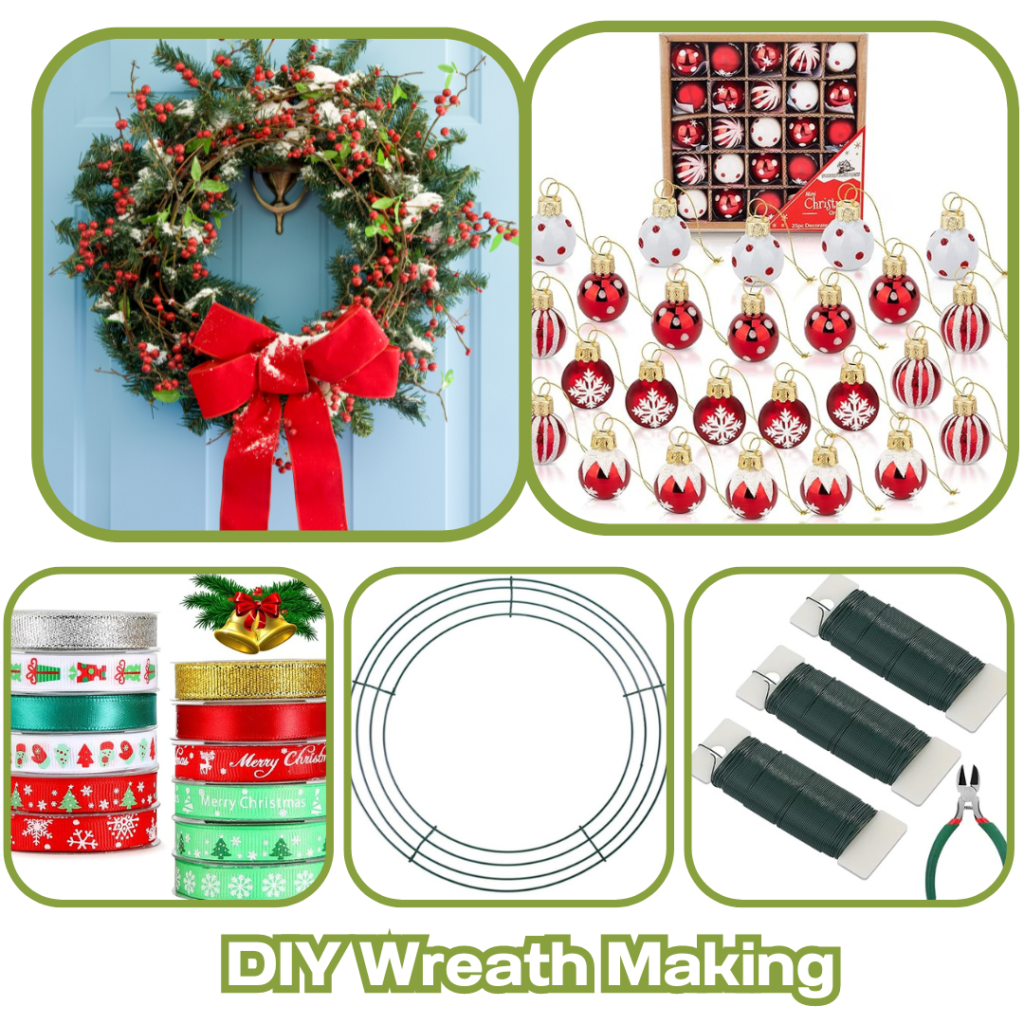
Materials You’ll Need:
- Wreath Base: Choose a wreath form as your base. These can be found at craft stores and come in various materials such as wire, foam, or grapevine. Select one that fits your style and preferences.
- Greenery: Opt for artificial or real greenery, depending on your preference and how long you want your wreath to last. Common choices include pine branches, eucalyptus, or even faux evergreen stems.
- Floral Wire: This will be your best friend throughout the process. Floral wire is used to secure the greenery to the wreath form and keep everything in place.
- Pruning Shears: If you’re using real greenery, a pair of pruning shears will be essential for trimming branches to the desired length.
- Ribbon: Choose a festive ribbon to add a decorative element to your wreath. You can use a single type of ribbon or mix and match for a more dynamic look.
- Embellishments: Consider adding ornaments, pinecones, berries, or other small decorations that complement your chosen theme.
- Hot Glue Gun: This will come in handy for attaching smaller embellishments securely.
Step 1: Prepare Your Work Area
Set up a clean and spacious workspace with all your materials within reach. Lay out your wreath form and greenery so you can easily visualize the design.
Step 2: Attach the Greenery
Take small bunches of your chosen greenery and secure them to the wreath form using floral wire. Wrap the wire around the stems of the greenery and the wreath form, making sure it’s tight and secure. Continue this process, slightly overlapping each bunch, until the entire wreath form is covered.
Step 3: Trim and Shape
Once the wreath form is covered, use pruning shears to trim any excess branches and create a more uniform shape. Take your time during this step to achieve the desired fullness and symmetry.
Step 4: Add Embellishments
Now comes the fun part—adding decorative elements! Use your hot glue gun to attach ornaments, pinecones, berries, or any other embellishments you’ve chosen. Be creative and experiment with different arrangements until you achieve the look you want.
Step 5: Tie a Bow
Create a bow with your chosen ribbon and attach it to the wreath. You can place it at the bottom, top, or off to the side, depending on your preference. The bow adds a festive and finishing touch to your creation.
Step 6: Hang and Enjoy
Once your wreath is complete, find the perfect spot to hang it. Whether on your front door, above the fireplace, or as a centerpiece on your dining table, your handmade wreath is sure to spread holiday cheer.
As you embark on this DIY wreath-making journey, remember that there are no strict rules—let your creativity guide you. Enjoy the process, and revel in the satisfaction of showcasing a beautiful, handmade piece of holiday decor that reflects your unique style. Happy crafting!